Discounts
How to Create Discounts in Shopify
Discounts can be a powerful tool to drive sales, reward loyal customers, and promote special offers. You can create various types of discounts in Shopify, including those for specific products, entire orders, or shipping costs. Below is a step-by-step guide on how to create a discount.
Step 1: Access the Discounts Section
- Log in to your Shopify admin dashboard.
- In the left-hand menu, navigate to the “Discounts” section. This is where you can manage all your discount settings.
Step 2: Create a Discount
- Click on the “Create discount” button to begin setting up a new discount.
Step 3: Choose the Discount Type
You'll need to select the type of discount you want to offer. Shopify provides the following discount options:
- Amount Off Products: Apply a fixed amount or percentage discount to specific products or collections of products.
- Buy X, Get Y: Offer customers a discount when they buy a certain quantity of one product and receive another product for free or at a discounted price.
- Amount Off Order: Apply a fixed amount or percentage off the total order amount.
- Free Shipping: Offer free shipping on an order when certain conditions are met.
Step 4: Set Discount Details
After choosing your discount type, you’ll need to define the discount's specifics:
- Method: Discount code or automatic discount.
- Discount Value: Determine the value of the discount (e.g., amount off, percentage off, or free shipping).
- Conditions: Set any conditions for the discount, such as minimum order value, specific products, or customer groups.
- Usage Limits: Specify any limits on how many times the discount can be used by each customer or within a certain time period.
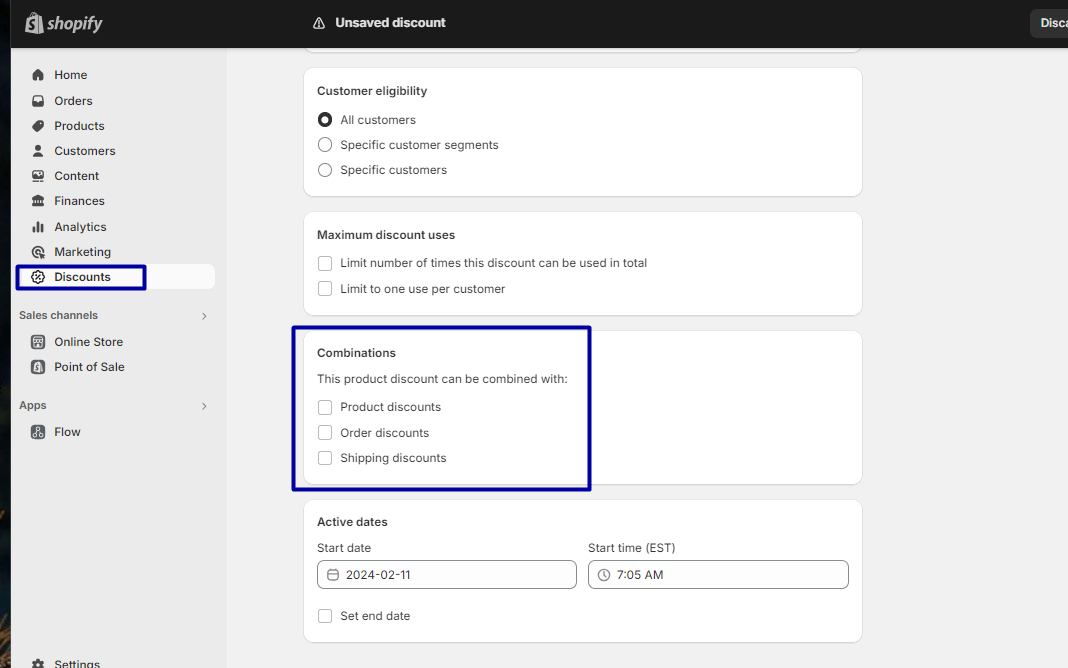
- Discount Combinations: For some deals, you might want customers to be able to use multiple discounts together to get the best savings on their purchases. (*Check detailed info about discount combinations below, step 6)
- Active dates: Set an expiration date for the discount, if applicable, to ensure that customers can only use the discount within the specified timeframe.
Step 5: Save the Discount
Once you’ve filled in all the required details for the discount:
- Click the “Save” button to create your discount.
- The discount will now be available for use by your customers based on the conditions you set.
Step 6: Promote Your Discount
After creating the discount, the next step is to make sure your customers are aware of it. Consider promoting your discount through the following channels:
- Email campaigns: Send out promotional emails to your customers highlighting the discount offer.
- Social media: Share the discount on your business’s social media profiles to reach a broader audience.
- Online ads: Use paid ads on platforms like Facebook, Google, or Instagram to increase visibility of your discount offer.
By actively promoting the discount, you can drive more traffic to your store and encourage customers to make a purchase.

Discount combinations. Detail info
You can choose which discounts can be combined to give customers the biggest discount possible. This works for both automatic discounts and discount codes.
When you allow a discount to be combined with others, you pick which types of discounts it can work with. For example, if you make a discount code that gives 10% off an order, you can let customers use that code along with other discounts on products too.
There are five types of discount combinations:
- order discounts with free shipping discounts
- product discounts with free shipping discounts
- product discounts with other product discounts
- product discounts with order discounts (only available to eligible merchants)
- order discounts with other order discounts (only available to eligible merchants)
For the discount page settings, navigate to discount combinations